Showing posts with label DIY. Show all posts

DIY Paint Splatter Boots

I painted these boots last year after reading the DIY on Annie Spandex. I've shown how to make these boots before on the blog, but I really love them, and since it's DIY day at Everybody Everywear, I thought I'd do a quick post on them again.


To make these boots you'll need: white boots, fabric paint, fabric medium, water, rubber bands, newspaper and a spray bottle.


I bought these boots for $5 several years ago and they never felt quite right, so I decided they'd be perfect for this.


First, twist the legs of the boots and divide with several rubber bands, as if you were going to tie-dye them.


Lay the boots on newspaper. Mix one part paint with two parts paint medium and a little water. Spray boots. I let mine dry for a few minutes and then sprayed a second color on.


Allow boots to dry overnight. Then untwist them and take off the rubberbands. Pretty easy!


How I styled them yesterday...


Vintage Shorts: Thrifted, $3. Vintage Sweater: Thrifted, $5., Bag: Charlotte Russe: $5.


DIY | Everybody, Everywear

outfit du jour: either/or

I was at a complete loss this week as to what to wear for Two Birds' Inspiration Monday but I have been looking at DIY deconstructed shirts all weekend. I finally decided I could wear black jeans and rip up a white shirt so I took some scissors to this one and this is how it turned out. I kinda like it but I really never wear sleeveless things so I think I might try it on another shirt too. If anyone wants me to show you exactly how I did this, let me know.

As always, if you leave a comment or become a follower, I'd be glad to return the favor.

Black Jeggings: Vanilla Star Jeans, $12., White Shirt: DIY.


Vintage Sunglasses: Thrifted, $3.


Earrings: Carole, Inc., set of three for $4.


Necklace: Masquerade, $5.


Ring: F21, $4.


Ring: F21, $3.


Peace Mood Ring: Lucky Brand, $50.


Vintage Bag: Thrifted, apx. $3.


Shoes: Fergie, $30.

Outfits du Jour/Thursdays are for Thrifting/DIY Tie-Dye Nail Tutorial

Here it is, the epic post I've been promising. Three outfits, a thrifting haul and a DIY tie-dye nail tutorial. Since this blog is so picture-heavy already, I'm not going to slow you down with tons of accessory photos, I'll just list each item and price them under the main photos. And guess what? Since I'm going out tomorrow night I've decided you might get an extra outfit post this week!

Today I was feeling a little under the weather and didn't really go anywhere, so I thought it would be a good day to play dress up (hey, I did this for you. I would have been happy to stay in my pajamas all day.)

Red Flannel Shirt: Borrowed.

Gold Leggings: American Apparel, Gift.

Belt: From Rugged Wearhouse, $3.

Band of Skulls T-Shirt: apx. $20.

Black Booties: Betsey Johnson, $60.

Hat: Secondhand, Gift.


(white socks and all)


Thursday's outfit...please pardon the 'I just spent hours walking in the rain' look. I had just spent hours walking in the rain. Not a bad thing though. Especially when you throw in good conversation, pizza, peanut butter fudge ice-cream, $.99 magazines, magnets and Megapuss' 'Surfing' on vinyl (What can I say...I love Devendra Banhart and rainy days).

Grey Vintage Boots: Thrifted, $5.
Jeans: Levi's, $35.
Multicolored Sweater: Charlotte Russe, apx. $10.
Black Sweater: Thrifted, $7.
Grey Hat: Thrifted, apx. $7.
Tan Messenger Bag: American Eagle.
Silver Leaf Necklace: Urban Outfitters, apx. $10.


Wednesday's outfit...pretty basic. Wore this to the Waffle House, so what do you expect?


Plaid Shirt: I Heart Ronson, $30.
Grey T-Shirt: from Rugged Wearhouse, $3.
Cream Beret: Charlotte Russe, $5.


Thursdays are for Thrifting, week 5 Haul
Yellow Vintage Dress: $6.

Blue Vintage Dress: $4.

Lilac Vintage Dress: $7.


Grey Vintage Bag: $4.

Tan Hat: $3.50.


DIY Tie-Dye Nail Tutorial
I've been doing this tie-dye nail treatment quite a bit over the last year, especially when the weather is warmer. I originally found it over on Annie Spandex, one of the first fashion blogs I discovered, and still one of my favorites. I usually do this with black and white polishes but for this tutorial I used black and pink.


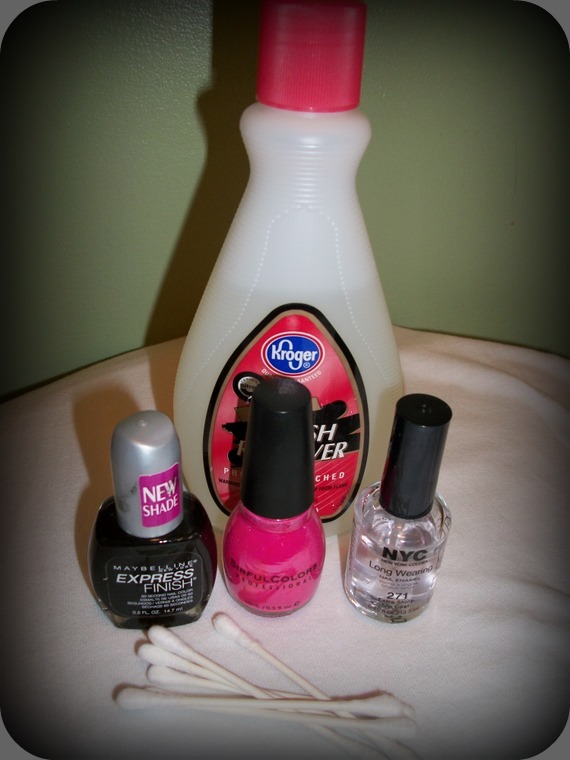
Here's what you'll need:

Two Contrasting Polish Shades, a top coat, q-tips and nail polish remover.


1. Decide which color you want to be the more prominent color in your tie-dye pattern and then paint your nails with one coat of the color you want to be LEAST prominent. You may want to do this before filing or trimming your nails.

2. When your first coat of nail polish is completely dry, paint a second coat on of the same color. Don't worry about it being messy. The more layers of nail polish you put on your nails, the harder it is to keep it only on the nail.
3. When your nails are completely dry, paint on one coat of your more prominent color. Again, don't worry about being messy.

4. When your nails are completely dry, dip a q-tip into nail polish remover and gently rub each nail until small patches of your first color start to show through. You can allow bigger or smaller patches to show through, depending on what you prefer.


5. When you have removed some polish from each nail, you may need to touch up a few places. This is the time to do that. Then use the q-tips and remover to remove any excess polish from around your nails.
6. Finally, paint on one coat of a clear top coat to help prevent chipping and allow to dry. The trim or file your nails as normal. It's easier to paint them before filing, especially if you have small nails, to give yourself more room to work with.

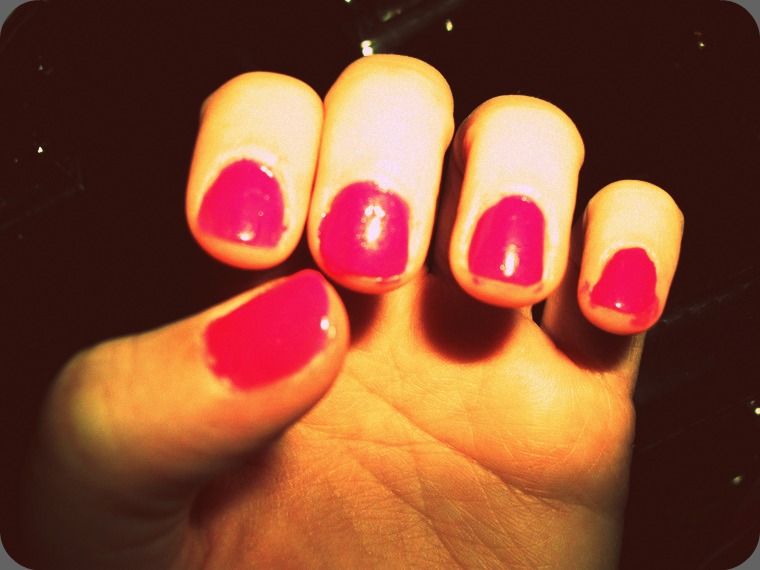
Your results should look something like this:

(Minus the fact that I hadn't removed the excess from the edges yet.)