
Today I was feeling a little under the weather and didn't really go anywhere, so I thought it would be a good day to play dress up (hey, I did this for you. I would have been happy to stay in my pajamas all day.)
 Red Flannel Shirt: Borrowed.
Gold Leggings: American Apparel, Gift.
Belt: From Rugged Wearhouse, $3.
Band of Skulls T-Shirt: apx. $20.
Black Booties: Betsey Johnson, $60.
Hat: Secondhand, Gift.

 (white socks and all)


Thursday's outfit...please pardon the 'I just spent hours walking in the rain' look. I had just spent hours walking in the rain. Not a bad thing though. Especially when you throw in good conversation, pizza, peanut butter fudge ice-cream, $.99 magazines, magnets and Megapuss' 'Surfing' on vinyl (What can I say...I love Devendra Banhart and rainy days).
 Grey Vintage Boots: Thrifted, $5.
Jeans: Levi's, $35.
Multicolored Sweater: Charlotte Russe, apx. $10.
Black Sweater: Thrifted, $7.
Grey Hat: Thrifted, apx. $7.
Tan Messenger Bag: American Eagle.
Silver Leaf Necklace: Urban Outfitters, apx. $10.


Wednesday's outfit...pretty basic. Wore this to the Waffle House, so what do you expect?

 Plaid Shirt: I Heart Ronson, $30.
Grey T-Shirt: from Rugged Wearhouse, $3.
Cream Beret: Charlotte Russe, $5.
Thursdays are for Thrifting, week 5 Haul
Thursdays are for Thrifting, week 5 Haul
 Yellow Vintage Dress: $6.
 Blue Vintage Dress: $4.
 Lilac Vintage Dress: $7.
 Grey Vintage Bag: $4.
 Tan Hat: $3.50.
DIY Tie-Dye Nail Tutorial
I've been doing this tie-dye nail treatment quite a bit over the last year, especially when the weather is warmer. I originally found it over on Annie Spandex, one of the first fashion blogs I discovered, and still one of my favorites. I usually do this with black and white polishes but for this tutorial I used black and pink.
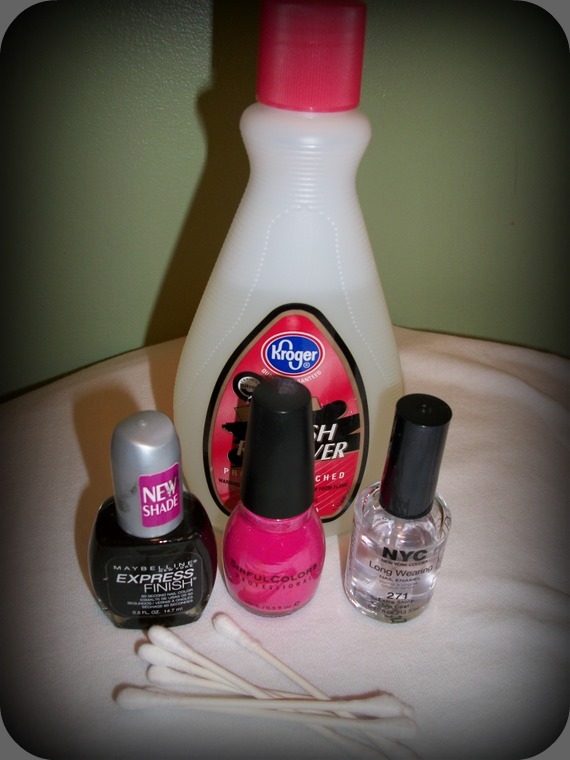
Here's what you'll need:
 Two Contrasting Polish Shades, a top coat, q-tips and nail polish remover.
1. Decide which color you want to be the more prominent color in your tie-dye pattern and then paint your nails with one coat of the color you want to be LEAST prominent. You may want to do this before filing or trimming your nails.

2. When your first coat of nail polish is completely dry, paint a second coat on of the same color. Don't worry about it being messy. The more layers of nail polish you put on your nails, the harder it is to keep it only on the nail.
 3. When your nails are completely dry, paint on one coat of your more prominent color. Again, don't worry about being messy.
 4. When your nails are completely dry, dip a q-tip into nail polish remover and gently rub each nail until small patches of your first color start to show through. You can allow bigger or smaller patches to show through, depending on what you prefer.
5. When you have removed some polish from each nail, you may need to touch up a few places. This is the time to do that. Then use the q-tips and remover to remove any excess polish from around your nails.
Here's what you'll need:
 Two Contrasting Polish Shades, a top coat, q-tips and nail polish remover.
1. Decide which color you want to be the more prominent color in your tie-dye pattern and then paint your nails with one coat of the color you want to be LEAST prominent. You may want to do this before filing or trimming your nails.
2. When your first coat of nail polish is completely dry, paint a second coat on of the same color. Don't worry about it being messy. The more layers of nail polish you put on your nails, the harder it is to keep it only on the nail.
 3. When your nails are completely dry, paint on one coat of your more prominent color. Again, don't worry about being messy.
 4. When your nails are completely dry, dip a q-tip into nail polish remover and gently rub each nail until small patches of your first color start to show through. You can allow bigger or smaller patches to show through, depending on what you prefer.
5. When you have removed some polish from each nail, you may need to touch up a few places. This is the time to do that. Then use the q-tips and remover to remove any excess polish from around your nails.
6. Finally, paint on one coat of a clear top coat to help prevent chipping and allow to dry. The trim or file your nails as normal. It's easier to paint them before filing, especially if you have small nails, to give yourself more room to work with.
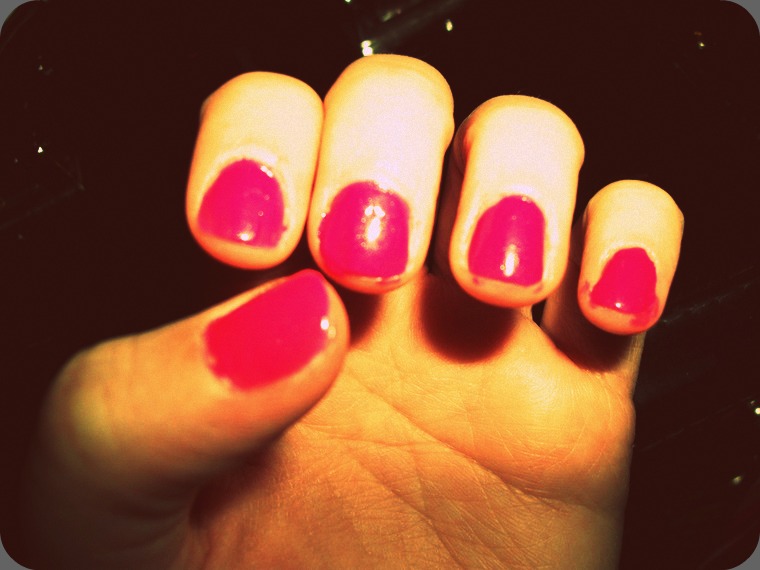
Your results should look something like this:
 (Minus the fact that I hadn't removed the excess from the edges yet.)

Your results should look something like this:
 (Minus the fact that I hadn't removed the excess from the edges yet.)
love the hat and cool nails!
ReplyDeleteI am in love with your golden leggins!!
ReplyDelete♥
http://www.aliavenue.blogspot.com/
LOVE the yellow dress you bought... can't believe it was such an awesome price!
ReplyDeletex